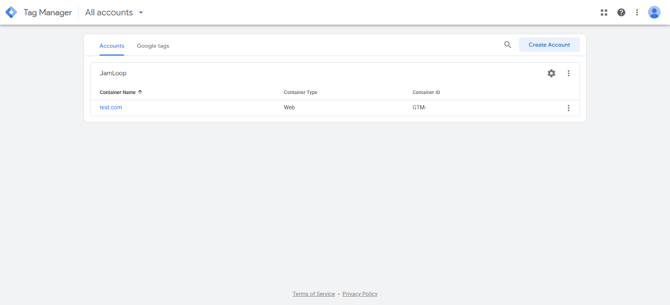
Step 1: Log in to Google Tag Manager
-
Go to https://tagmanager.google.com/ and sign in to your account.
Step 2: Select the Container
-
Choose the container associated with the website where you want to install the JamLoop pixel.
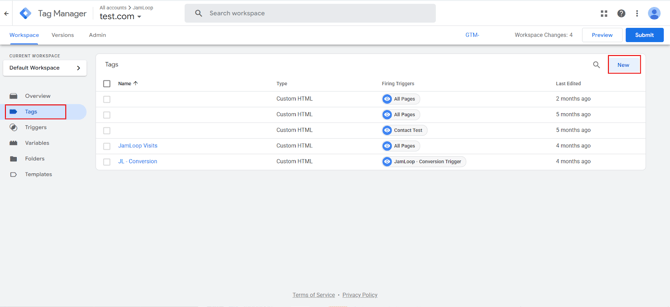
Step 3: Create a New Tag
-
In the left sidebar, click Tags.
-
Click the New button to create a new tag.
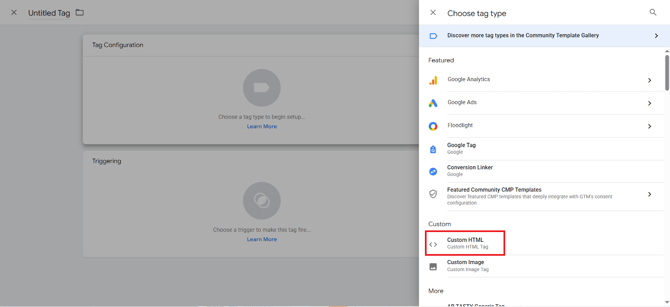
Step 4: Configure the Tag
-
Under Tag Configuration, select Custom HTML.
Paste the JamLoop pixel code below into the HTML field:
<!-- JamLoop Pixel -->
<script defer src="https://p.jmlp.app/sdk.js"></script>
<script>
  window.__adcloudiq__ = window.__adcloudiq__ || [];
  __adcloudiq__.push(function () {
    __adcloudiq__.track({
      advertiserId: "8bf6f3e0-4233-269d-b04c-8c262160cf4a",
      pixelId: "242de2a1-e43c-214a-b3e2-5142e3144e23"
    });
  });
</script>
<noscript>
  <img
    src="https://t.jmlp.app/pixel/advertiser/8bf6f3e0-4233-269d-b04c-8c262160cf4a/pixelId/242de2a1-e43c-214a-b3e2-5142e3144e23"
    alt=""
    width="0"
    height="0"
  />
</noscript>
<!-- End JamLoop Pixel -->
Step 5: Set the Trigger for the Tag
-
Scroll down to Triggering.
-
Choose when you want the pixel to fire:
-
To track page views, select Page View → All Pages.
-
To track specific actions or clicks, create a Click Event trigger that matches your desired button or link.
-
Option 1: Page View — Track All Page Loads
Use this when you want the pixel to fire every time a page loads.
Click Triggering → + (New)
Choose Page View
Select All Page Views
✅ Recommended for: sitewide page tracking (fires on every page load)
Option 2: Click Event — Track Button or Link Clicks
Use this if you want to track when a visitor clicks a specific button or link.
Click Triggering → + (New)
Choose Trigger Type → Click – All Elements
Select Some Clicks
Under conditions, choose:
Variable:
Operator: matches CSS selector
Value:
a.fl-button[href*="contact"]💡 Example: To track the “Start Planning” button, use
a.fl-button[href*="contact"]as the selector.
Adjust the selector based on your site’s HTML (for example,.cta-button,#start_planning, etc.).
Option 3: Form Submission — Track When a Form Is Submitted
Use this if you want to capture leads or contact-form completions.
Click Triggering → + (New)
Choose Form Submission
Select Some Forms
Set conditions such as:
Variable:
orOperator: contains
Value: a unique identifier for your form (for example,
contact-form)💡 Test in Preview Mode to ensure GTM recognizes the form submission event.
Option 4: Custom Event — Track Events Triggered by Scripts
If your site uses JavaScript to push custom events to the dataLayer, you can trigger the pixel on those events.
Click Triggering → + (New)
Choose Custom Event
Enter the event name (for example,
formSubmitSuccess,videoPlay, etc.)💡 Developers can push events to the dataLayer like this:
dataLayer.push({ event: 'formSubmitSuccess' });
Best Practices
Always test in GTM Preview Mode before publishing.
Make sure each trigger fires only once per action.
Use clear, consistent naming for triggers (e.g.,
JamLoop – Page View,JamLoop – Start Planning Click,JamLoop – Form Submit).
Step 6: Save the Tag
-
Click Save to save your new tag.
Step 7: Test the Tag in Preview Mode
-
Use Preview mode in Google Tag Manager to ensure your pixel fires correctly before publishing.
-
You should see the JamLoop tag firing on the correct page or action in the GTM debug console.
⚠️ Important: Always verify your tag in GTM Preview mode before publishing.
Step 8: Publish the Container
-
Once confirmed, click Submit in the upper-right corner to publish your container changes.
💬 Need Help?
If you encounter any issues or need assistance verifying your setup, contact your JamLoop account representative or email support@jamloop.com.